Server Initialization
These are the steps you will take to start running your Minecraft server.
The first task we need to do to set up and host a Minecraft: Java Edition Server is to download the Minecraft Server .jar file, also called a Java ARchive file, install it, and then change its configuration settings. This task will require you to use of the Command Prompt app and run some command lines. But do not worry, we will guide you through every step of the process!
Table of contents
Getting Started
Before we download the
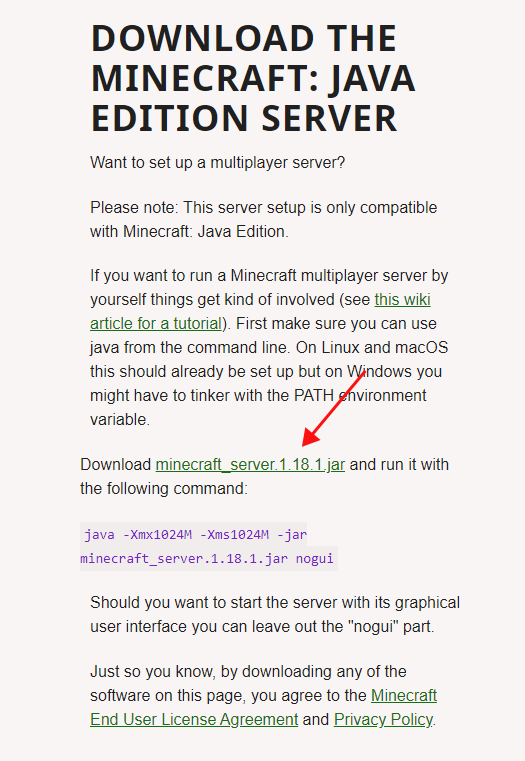
.jarfile, we need to create a folder to keep all of the server files in. Create the folder on your desktop and name it “Minecraft Server”.Go to www.minecraft.net/en-us/download/server and download the
minecraft_server.1.XX.X.jarfile and save the file in the “Minecraft Server” folder we created.In order to run the commands in the Command Prompt, we need to know the location, or filepath, of the
.jarfile we downloaded. We can determine the file path by opening the folder and clicking on the address bar near the top. In this example, the file path is:C:\Users\lbeiq\Desktop\Minecraft Server.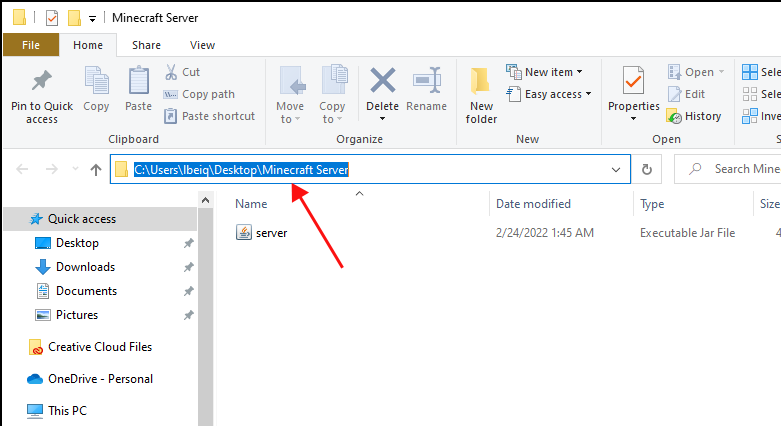
Starting the Server
To proceed with the next steps. we need to open up the Command Prompt application. On your desktop, go to the bottom left search bar and type in “Command Prompt”.
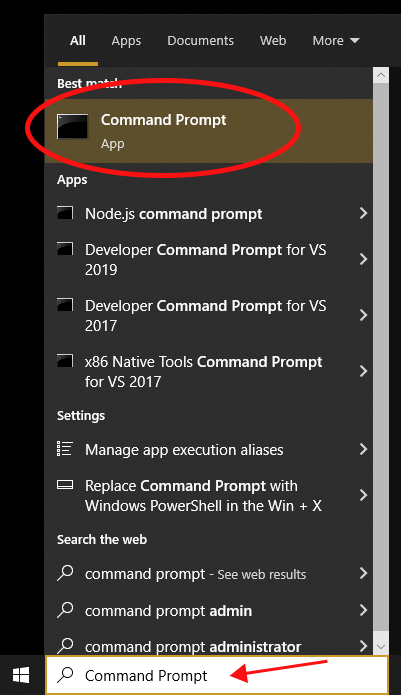
In the command prompt, type the command:
cdfollowed by a space and then the file path to the location of the.jarfile. Hit enter to run the command. In this example, the command is:cd C:\Users\lbeiq\Desktop\Minecraft Server.Once you are in the correct directory in the command prompt, type the command:
Java -jarfollowed by a space and the name of your.jarfile. Hit enter to run the command. In this example, the command is:Java -jar server.jar.
Changing the Configurations
In the Minecraft Server folder, open the
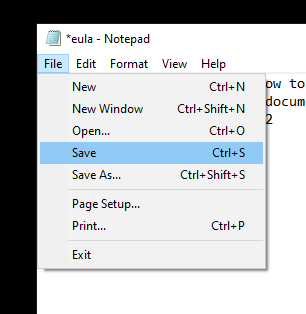
eula.txtfile by double-clicking it. Inside the file, change the lineeula=falseand replace it with the lineeula=true. You might notice a star in the file header in the top left. This indicates that there are unsaved changes. Make sure to save your changes and then close the file.
Locate the server file with the file type:
properties source file, and then right-click it, select Open with, and then Choose another app. Next, click on more apps, and scroll down until you find Notepad. Select Notepad and the file should open up with all of the Minecraft server properties.
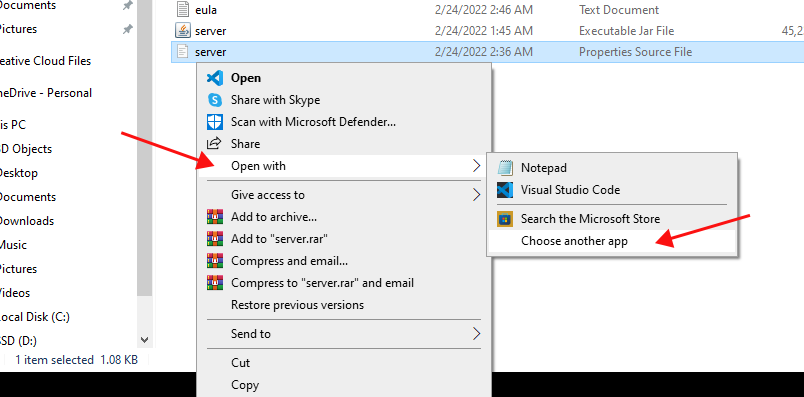
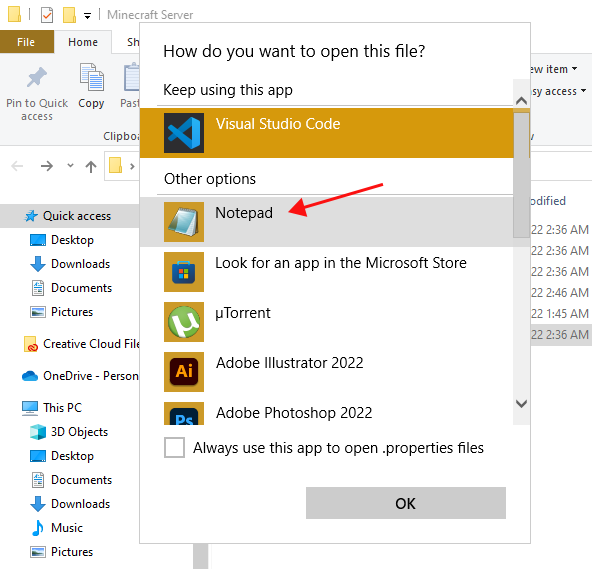
Look for the
query.portline and write down the port number. This will be important when we forward the ports in Port Forwarding, to allow other users to join the server.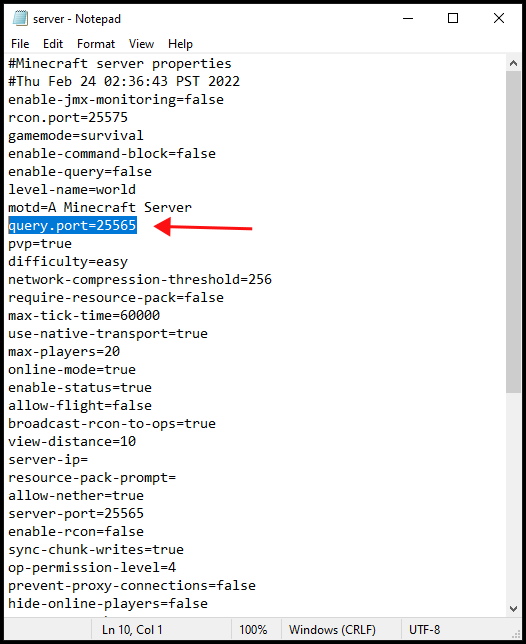
You probably noticed there are a lot more settings in this file that can enhance your play experience, and we strongly recommend you take a detailed look through them at a later time.
Running the Server
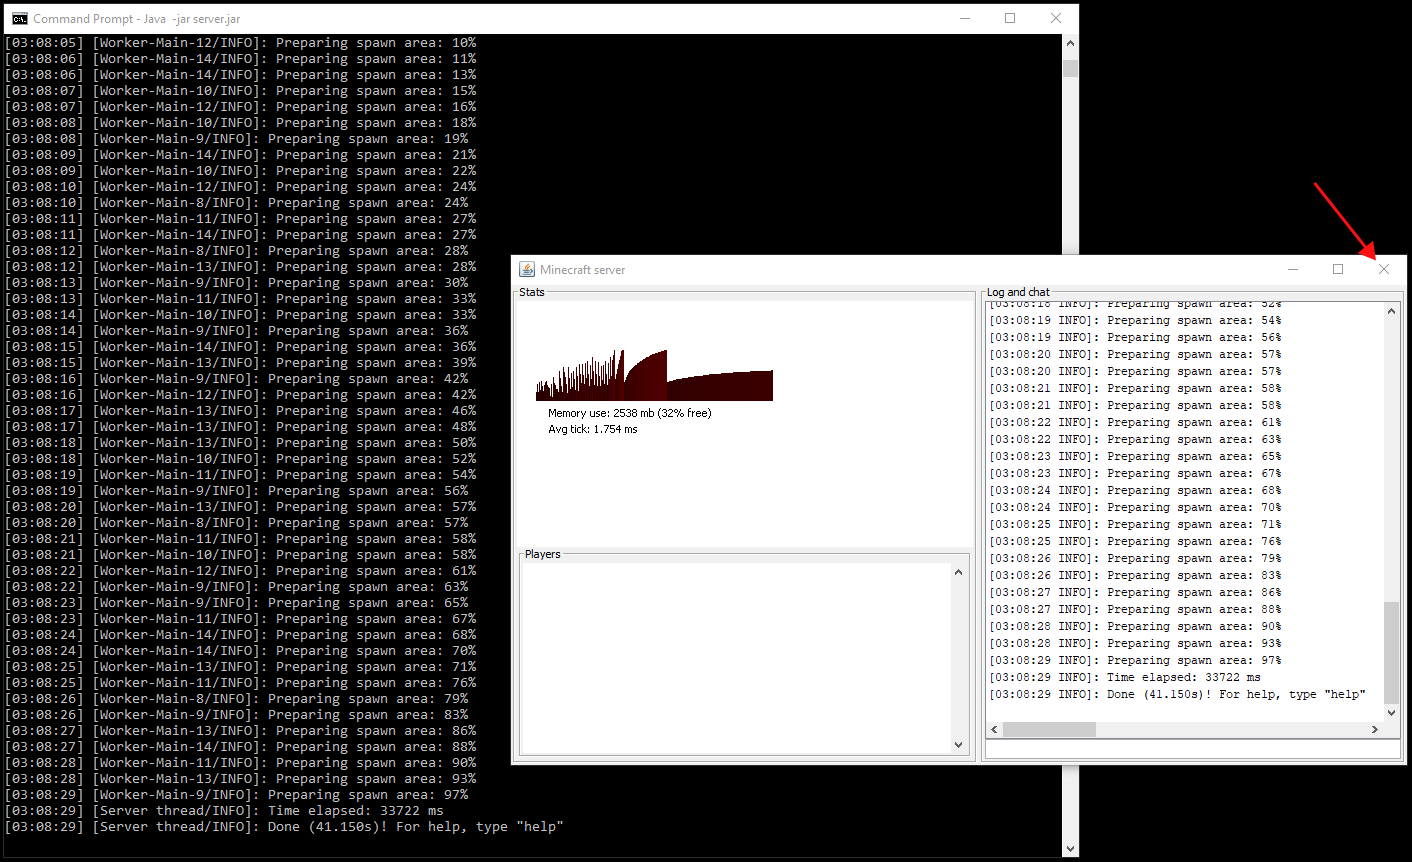
Now that we have the port number recorded, we return to the command prompt app. To run the server, simply repeat the steps from Starting the Server. If you get a Windows Security Alert, simply Allow access to Private networks, such as my home or work network.
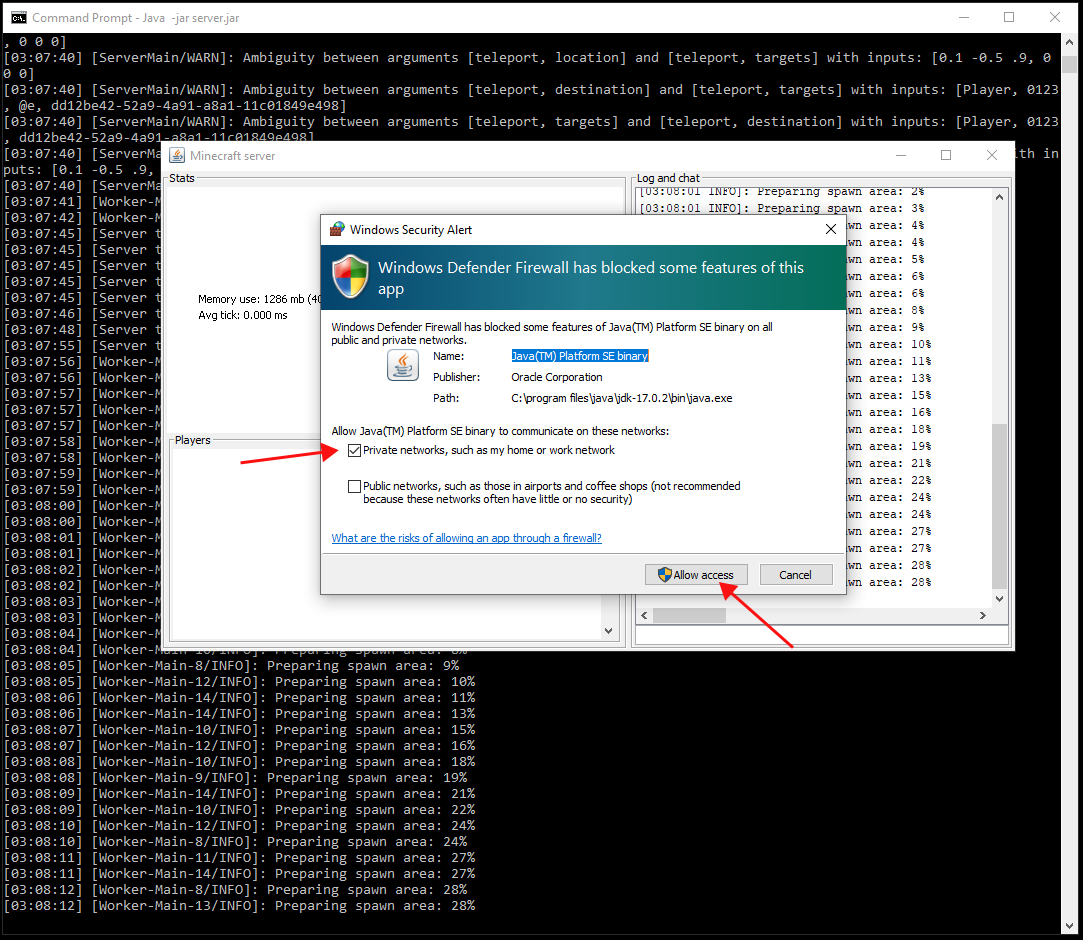
And thats it! Your server should now be running! If you want to close your server, simply close the Minecraft server app and the server will turn off.
Conclusion
Great job! Next we will forward the server port so that we can invite other users to the Minecraft Server!
