Port Forwarding
Now that our Minecraft server is up and running, we need to configure some settings in our network to give other players access to the server. This is a very short process, however, there can be a lot of variability in this task because every router is different. In this guide, we will cover the steps you will have to take if you are using a Shaw Blue Curve router, but we will also briefly detail the “general” set of steps you should take if you have a different router.
Table of contents
Finding the IP Addresses
First, we need to find your Internal IP Address.
If you are on Windows, open the Command Prompt App. Next type the command:
ipconfig, this will give you a list of Ethernet adapters. Look for theIPv4 address(it begins with192.168) and write it down.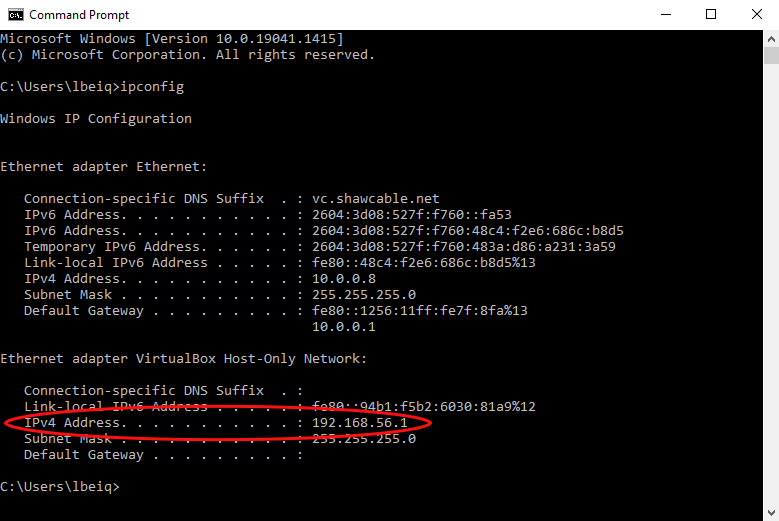
If you are on Mac, open the Terminal App. Next type the command:
ifconfig, this will give you a list of Ethernet adapters. Look for theIPv4 address(it begins with192.168) and write it down.Next, we need to find your External IP Address. Thankfully, this one is really easy. Go to the website whatismyipaddress.com and look for the
IPv4 addressnear the top of the page. Once again, write down this information because we will need it shortly.
Port Forwarding
For this part of the guide, we will give you the step by step instructions needed to forward the port on the Shaw Blue Curve Router. However, we can only give you more generalized instructions if you are currently using different router.
Shaw Blue Curve Router
Now that we have our Internal and External IP Addresses and the port number from Server Initialization (by default this port number is 25565), we can proceed to go into the settings of our router and enable Port Forwarding.
Connect to your Blue Curve Web App but visiting internet.shaw.ca/connect. On the main hub, click on Connect near the middle of the top of the page. Then click on your wireless network.

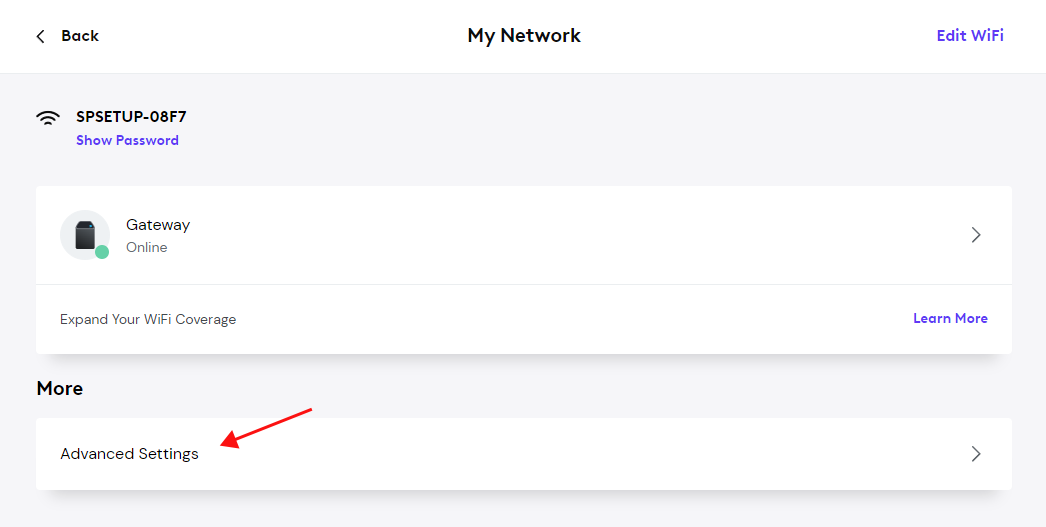
Under the More tab, click on Advanced Settings.
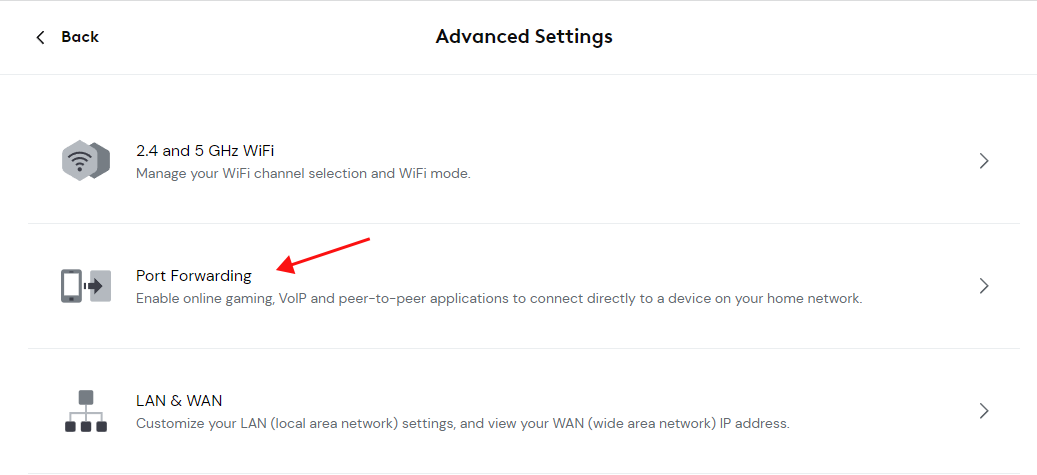
Click on Port Forwarding.
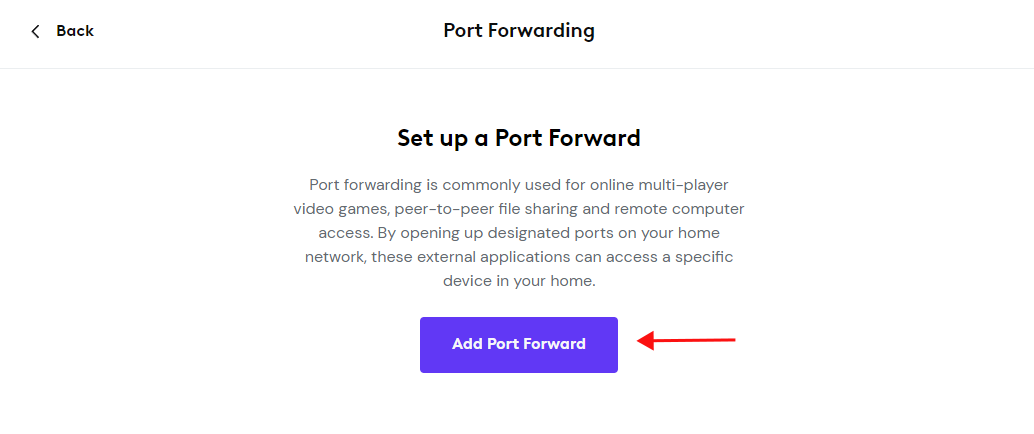
Click on Add Port Foward.
Select your DESKTOP for the device used for this port. For the configuration, choose Manual Setup or Minecraft. Set the Port Number to the one we wrote down earlier, which will be
25565by default. Ensure that TCP/UDP is the Protocol. Hit next and that’s it!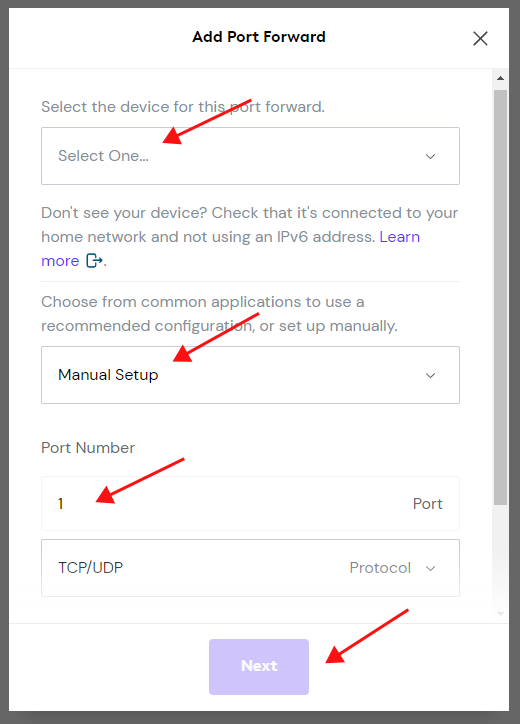
Telus or Other Router
If you do not have a Shaw Blue Curve Router, there are a few general steps you can take here. In your browser, type in your Internal IP Address. This will hopefully allow you to access your router. Inside this page, look for “advanced settings” or “networking”, and then look for “Port Forwarding”. If given a choice, you’ll want to Manually Enter this information:
 Service name: Minecraft Server
 Service type: TCP/UDP
 Port Ranges: 25565
 Internal IP Address: (What you wrote down in step 1)
 External IP Address: (What you wrote down in step 2)
Changing the Configurations
Find the server file in the Minecraft server folder of the file type
properties source file, and then right-click it, select Open With, and then select Notepad. The server file should open and display all of the Minecraft server properties.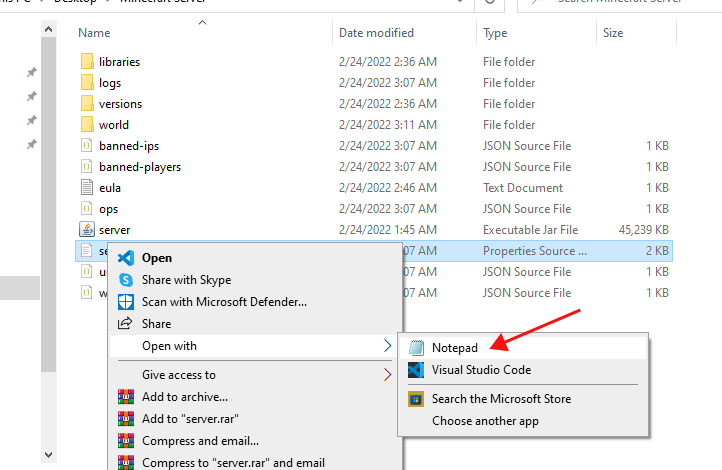
Inside the server file, find the
server-portandserver-ipentries. Setserver-portto the same value that we found earlier and used in Port Forwarding, which is25565by default.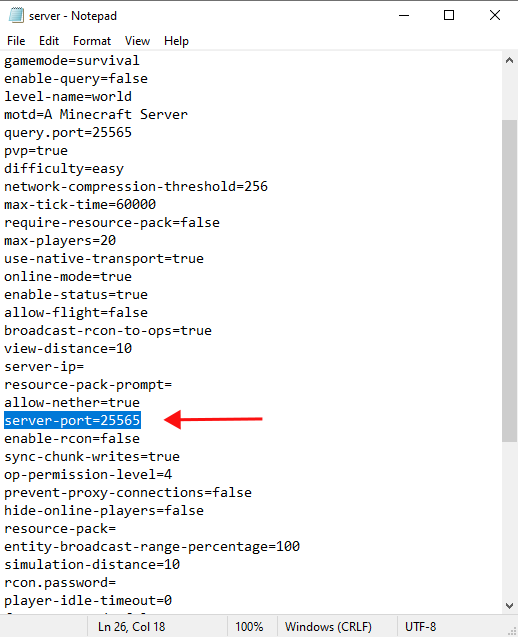
Next, set the value of
server-ipas the same as your Internal IP Address from step 1 of Finding the IP Addresses.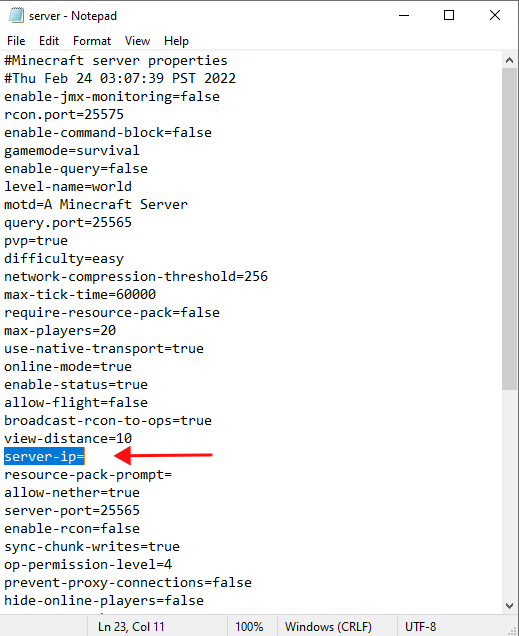
Joining the Server
We are almost done! Next, simply start the server by following the steps from Server Initialization.
Finally, boot up your Minecraft client and enter the External IP Address from step 2 of Finding the IP Addresses and you should be able to connect to your server!
Conclusion
Congratulations! Your friends can now join you in your world. Don’t forget to install some mods for your server to heighten your experience.