Introduction
On a public server players can collaborate with other plays to build more and play mini games. However, you cannot control exactly who can connect to the public servers. By setting up your own local server you can control exactly who can connect.
This guide is for parents that want a safer environment for their kids to collaborate with their friends on minecraft, or seasoned minecraft players that want their own private servers to play on with their friends. This guide will also help you with installing mods and or plugins to improve your Minecraft server experience!
Setting up your own local server requires changing your home network’s configuration and is not recommended unless you know what you are doing. If you still want to go with this free route, please do so at your own risk!
Table of contents
Intended Users
Users of this guide are expected to have basic understanding of the windows operating system and the ability to read and understand command lines. Users do have to be comfortable installing files and programs, accessing computer folders and editing files. Pictures and clear instructions are provided throughout the guide to try and accomodate users at all skill levels.
Prerequistes
Install Java
As a prerequisite to setting up the Minecraft server, we need to ensure that your computer can run and operate Java.
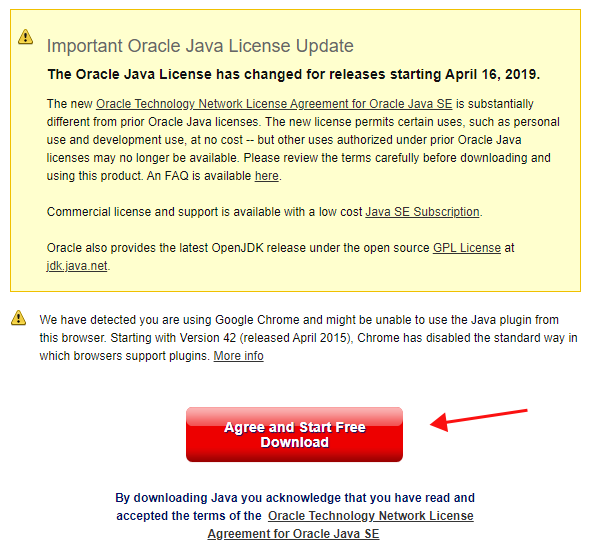
Go to www.java.com/en/download and click on the Agree and Start Free Download button. Remember to keep track of where you download the file.
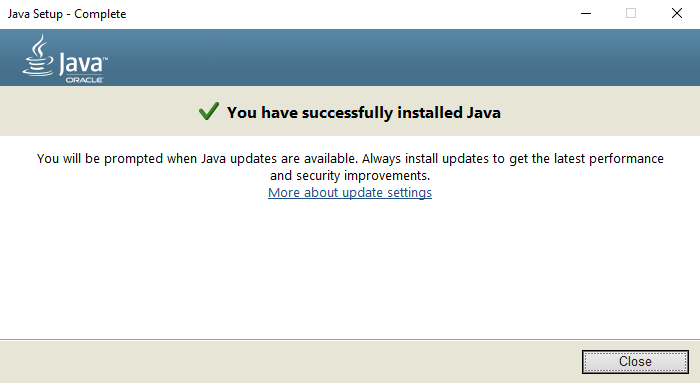
Locate the file you just downloaded, double click it and follow the installation wizard. Once you are done with this step, you will see the “You have successfully installed Java” message.
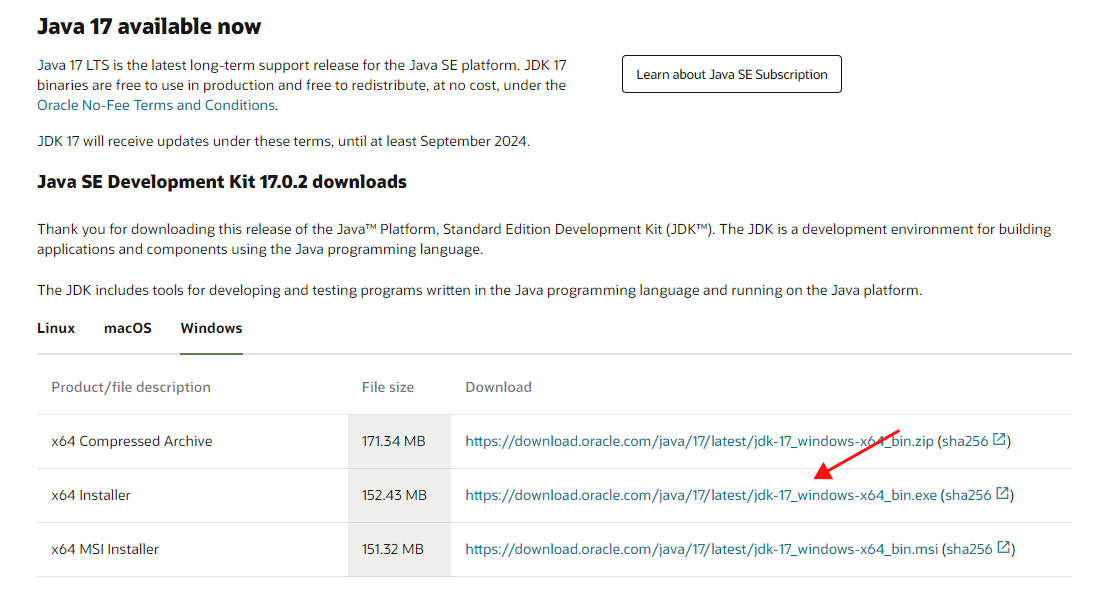
Next, we are going to download the Java Dev Kit. Go to www.oracle.com/java/technologies/downloads and click on the x64 installer download link. Make sure that the Windows tab is bolded, otherwise, the file downloaded will not work with Windows.

Once again, locate the file you downloaded, double click it and follow the installation wizard.
System Requirements
This is the list of hardware requirements for Minecraft Java Edition as per the official Minecraft website.
| Minimum Requirements: | Recommended Requirements: | |
|---|---|---|
| CPU | Intel Core i3-3210 3.2 GHz/ AMD A8-7600 APU 3.1 GHz or equivalent | Intel Core i5-4690 3.5GHz / AMD A10-7800 APU 3.5 GHz or equivalent |
| GPU (Integrated) | Intel HD Graphics 4000 (Ivy Bridge) or AMD Radeon R5 series (Kaveri line) with OpenGL 4.4* | |
| GPU (Discrete) | Nvidia GeForce 400 Series or AMD Radeon HD 7000 series with OpenGL 4.4 | GeForce 700 Series or AMD Radeon Rx 200 Series (excluding integrated chipsets) with OpenGL 4.5 |
| RAM | 4GB | 8GB |
| HDD | At least 1GB for game core, maps and other files | 4GB (SSD is recommended) |
| OS | Windows: Windows 7 and up -macOS: Any 64-bit / OS X using 10.9 Maverick or newer / Linux: Any modern 64-bit distributions from 2014 onwards | 64 bit recommended: Windows: Windows 10 / macOS: macOS 10.12 Sierra / Linux: Any modern distributions from 2014 onwards |
Conclusion
All done! Now we can begin setting up the Minecraft Server.

